没用 nas 之前照片是保存到本地电脑硬盘上的,有 100 多 G 的视频与照片,2019 年,发现很多照片只显示一半或直接无法打开,导致少了很多美好回忆。所以组了个群晖 6,群晖 6 有一点不太好,相册不支持 HEIC 格式 (占空间少,现在很多手机相机都支持这种格式),到群晖发布了群晖 7,相册支持了 HEIC 格式,马上升级到群晖 7.01。毕竟不是白群晖,怕里面的照片那天一不小心有没了,所以想在网盘上做个备份,在网上百度了一下,查询了 6、7 个小时,只在网上找到大致这二种方法,如下:
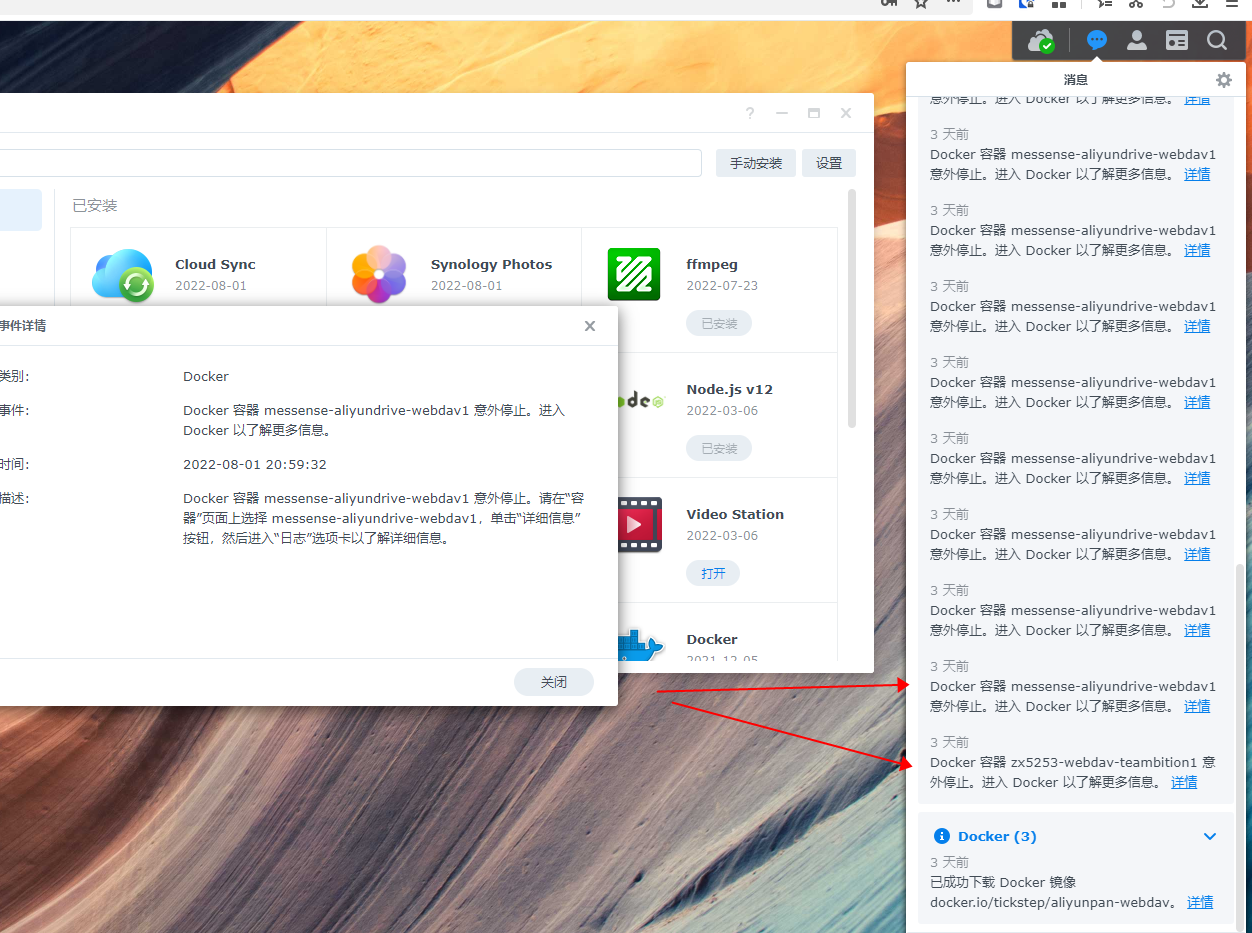
方法一、Docker 安装 “ZX5253/webdav-aliyundriver” ,这个方法也是网上最多的,现在直接找不到这个,可能开发者已经停止开发了。我测试的 “zx5253-webdav-teambition”,也还是不行
方法二、Docker 安装 “messense/aliyundrive-webdav”,
应该是方法一失效后,才有的方法二。方法二现在也不行了,至少我这是不行(这二咱方法,现在还能正常用的举个手),都是无限重启中,见下图。
在 Docker 上,试了好多与阿里云盘相关的镜像,最终发现了下面这个软件,为了大家方便,把这个软件使用方法总结了一下。因为大家很多与我一样,都是不太懂,我就按照大致方法一步步来一遍(很多都是网上找来的方法),安装过或会的请跳过对应步骤,有不对的地方,请大神指教一下
运行环境
- 群晖 DS918+
- DSM7.01
- docker 20.10.3-1239
- Synology NAS 2.5.1-2226
一、查找要同步的阿里云盘的 token(已知的请跳过)
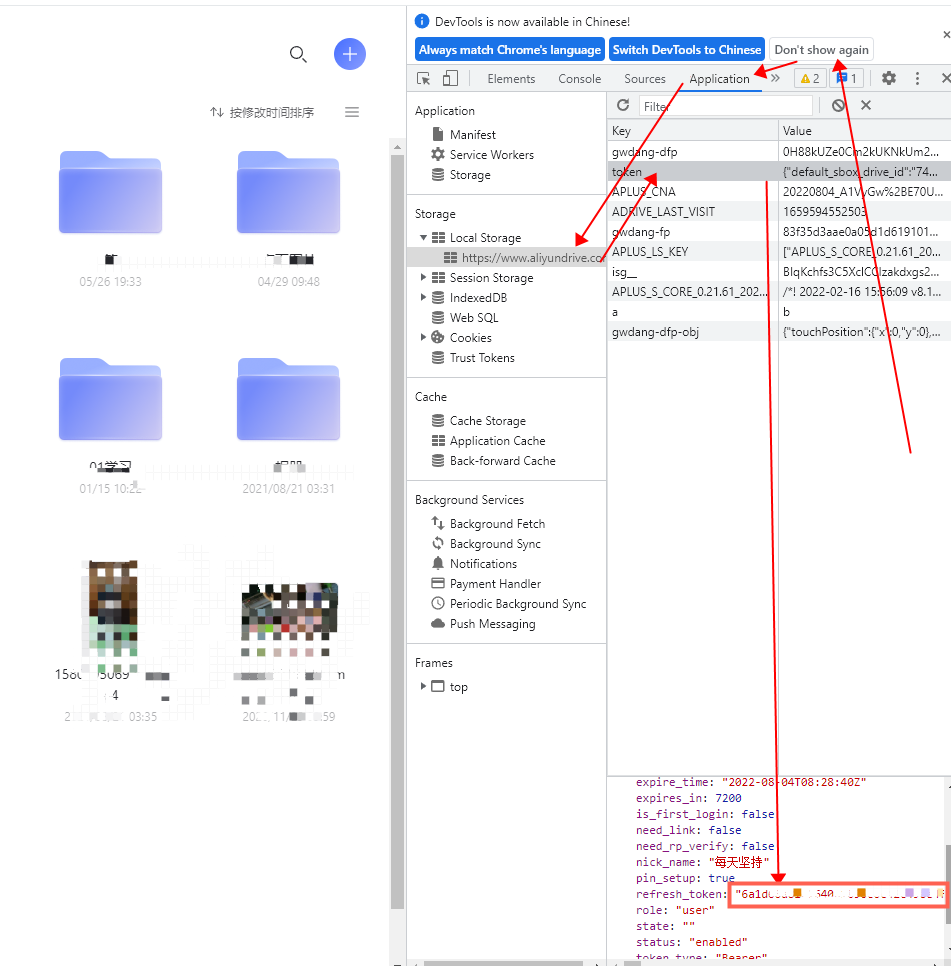
1、浏览器(我用的是 360 极速浏览器)打开 https://www.aliyundrive.com/drive/ ,扫码或短信登录
2、登录成功后,按 F12 打开开发者工具,点击 Application,点击 Local Storage,点击 Local Storage 下的 https://www.aliyundrive.com/,点击右边的 token,此时可以看到里面的数据,其中就有 refresh_token,把其值复制出来即可。(格式为小写字母和数字,不要复制双引号。例如我的是:6a1d…)
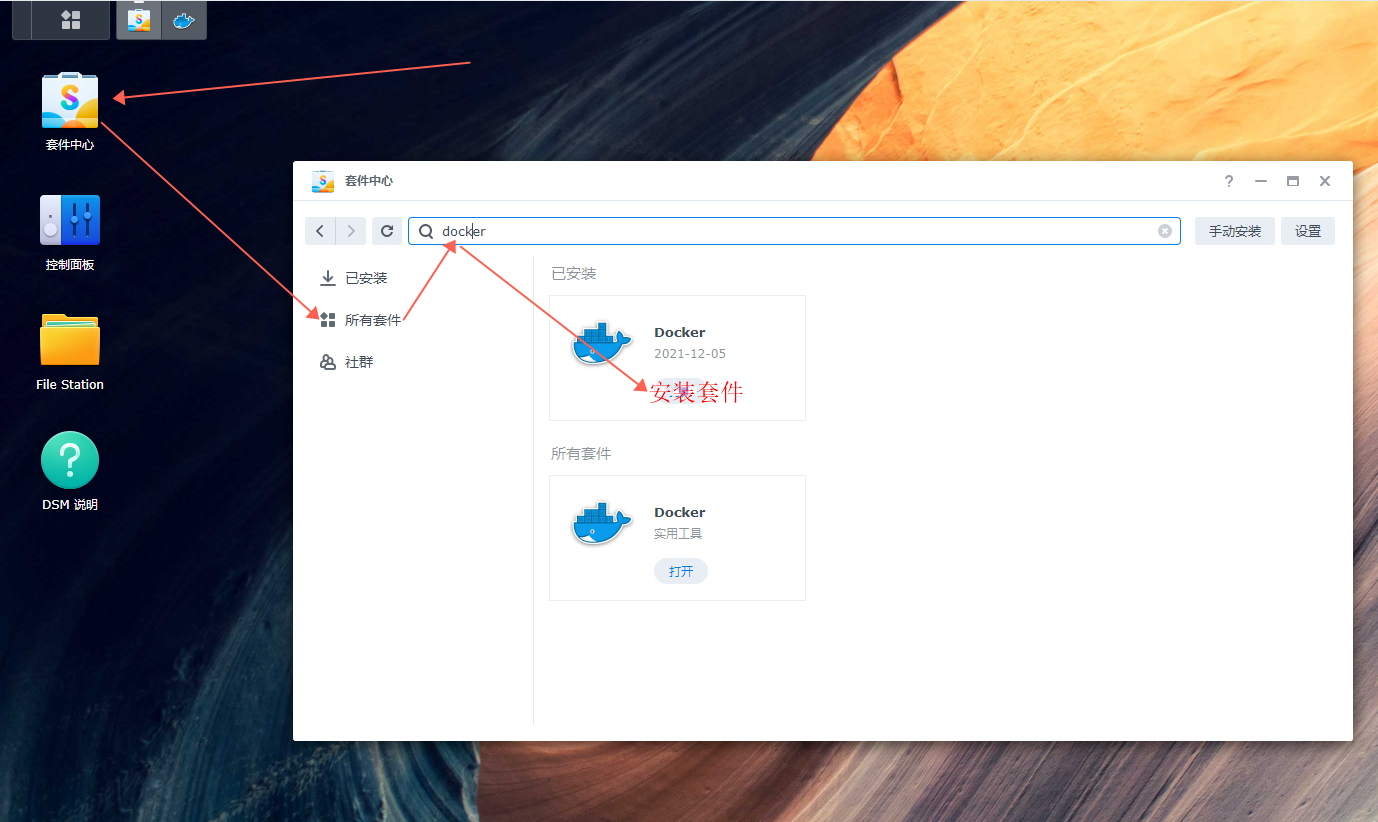
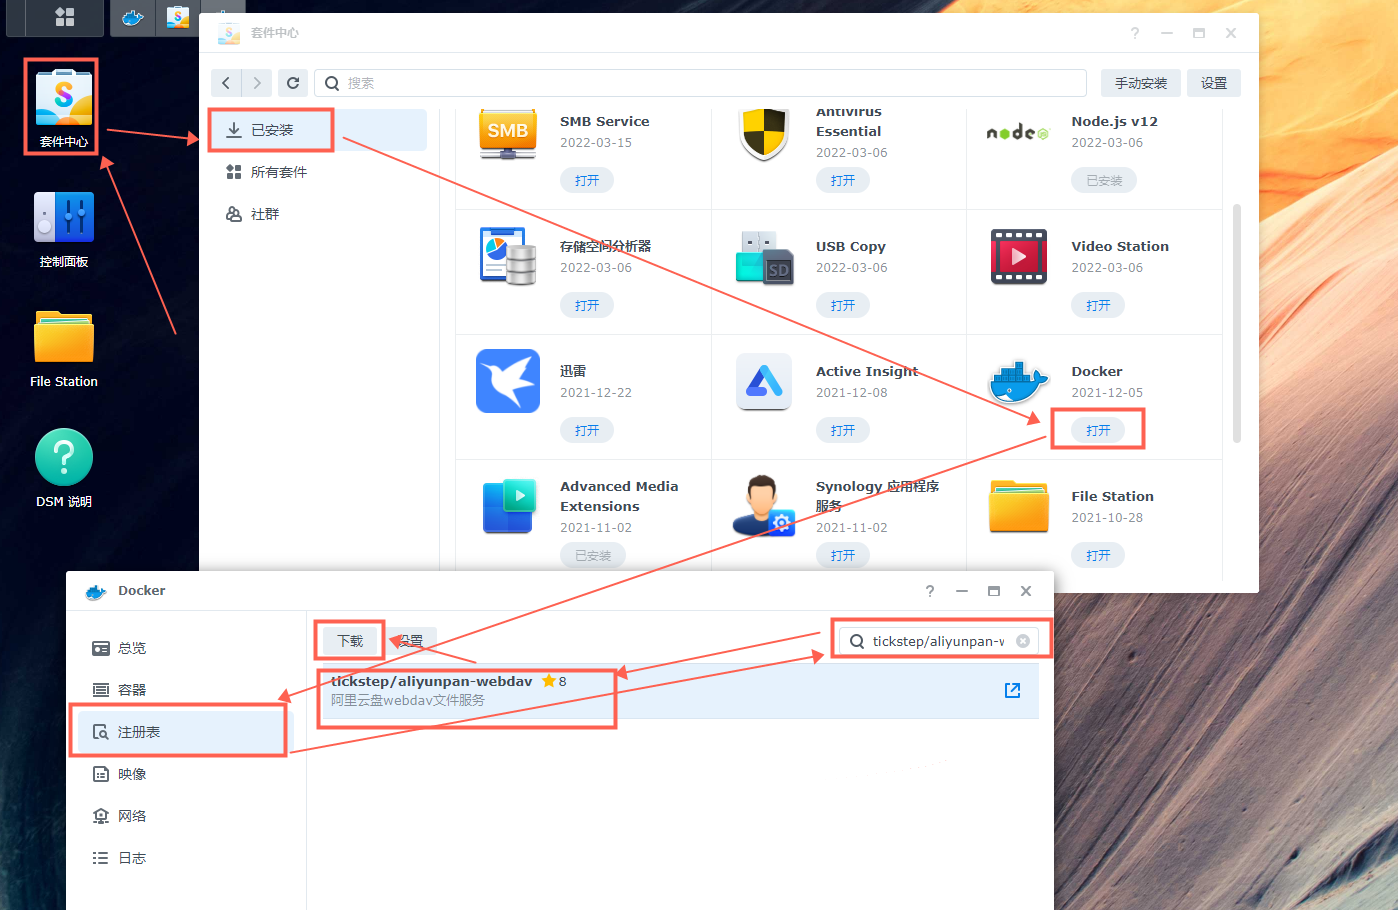
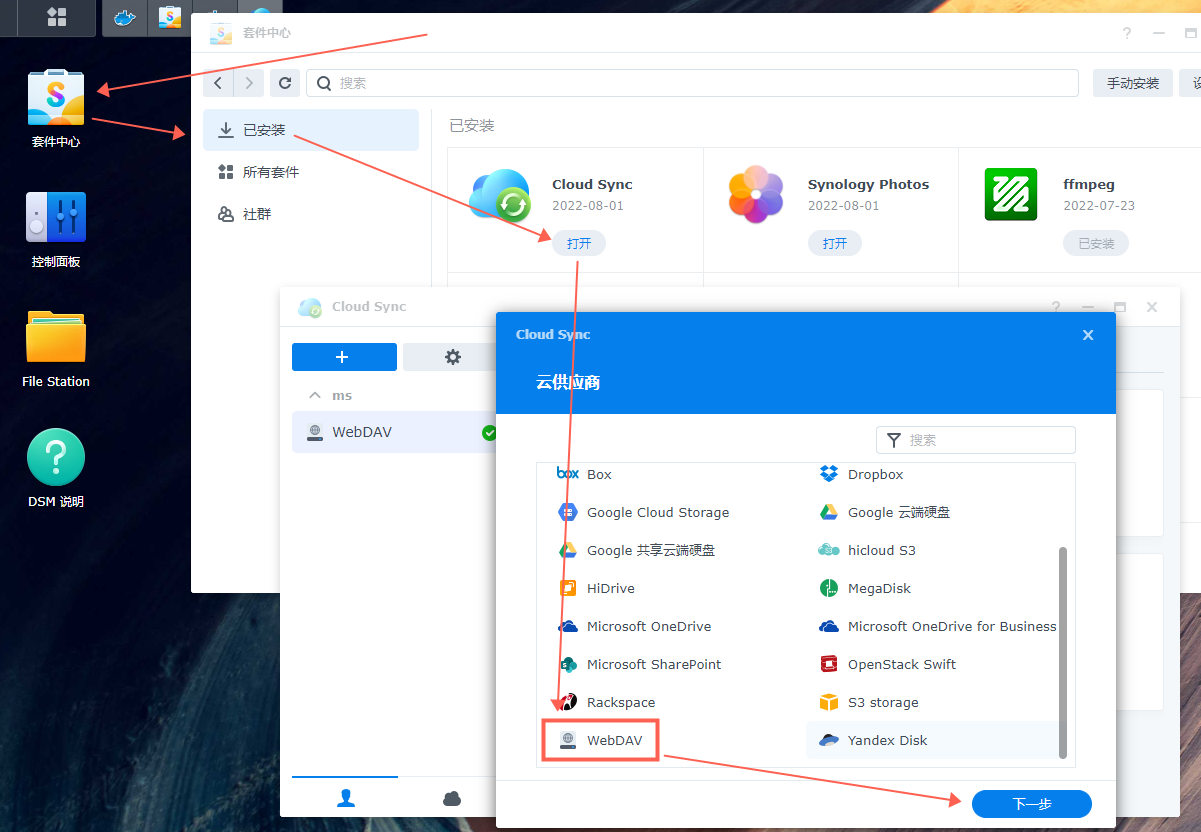
二、群晖内套件中心下载安装 “Docker” 与 “cloud sync” (已安装的请跳过)

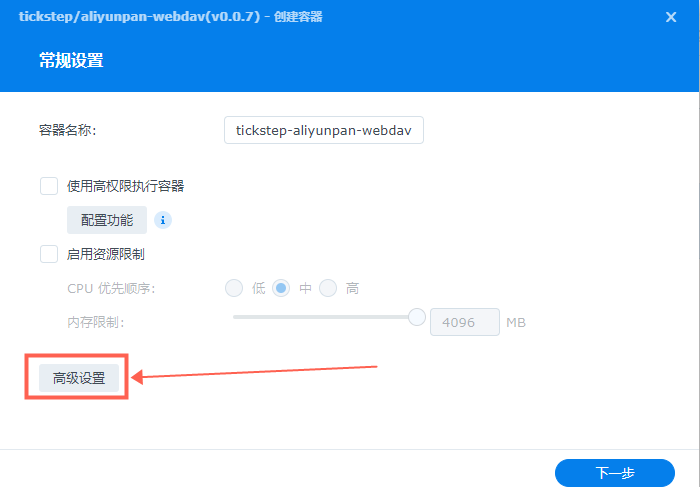
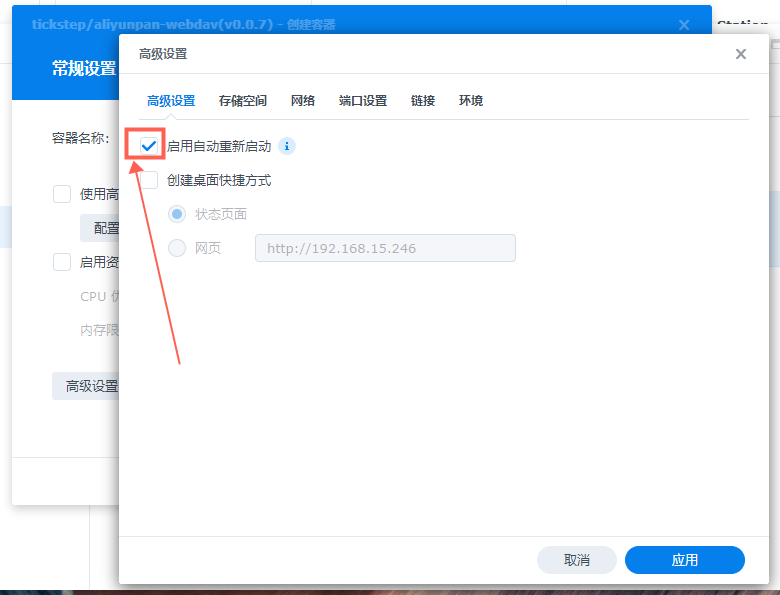
三、Docker 具体设置
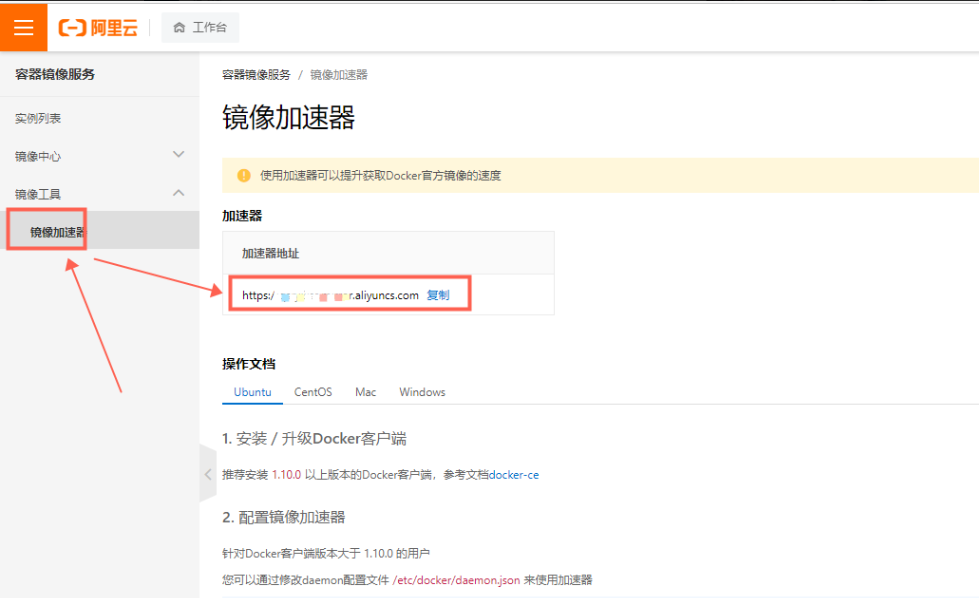
①、登录阿里云( https://cr.console.aliyun.com/cn-hangzhou/instances/mirrors ),找到镜像加速器,复制加速器地址,如下图所示:
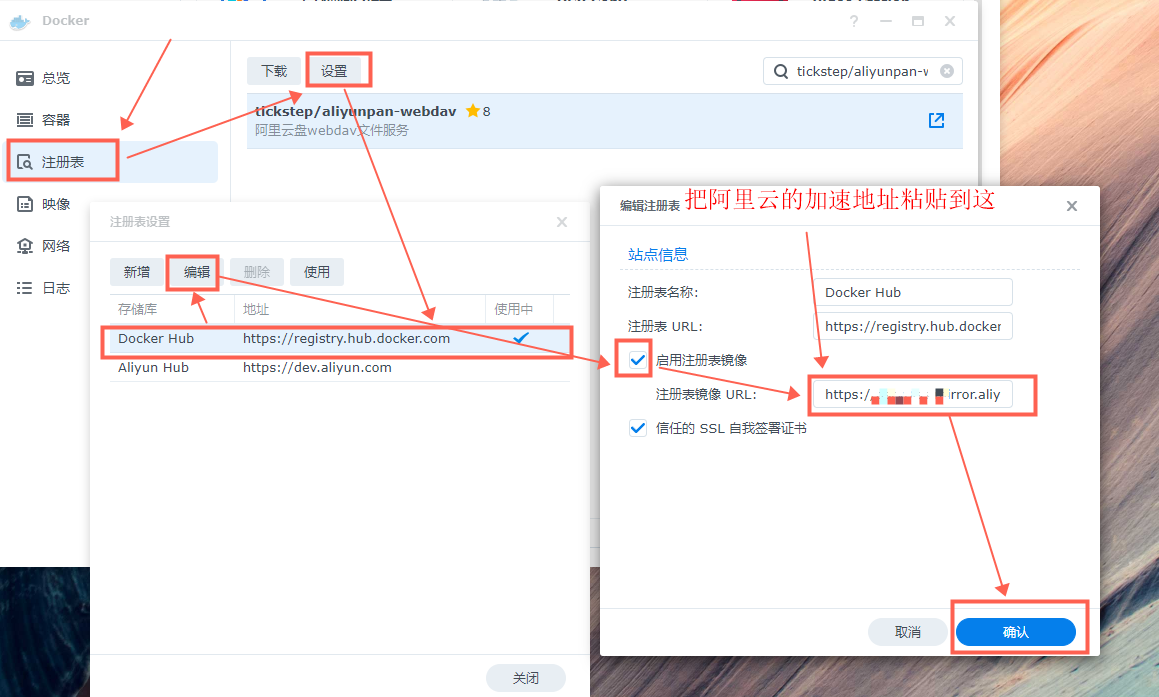
②打开 Docker ,按下图操作(①的加速器地址复制到 “注册表镜像 URL” 里面)

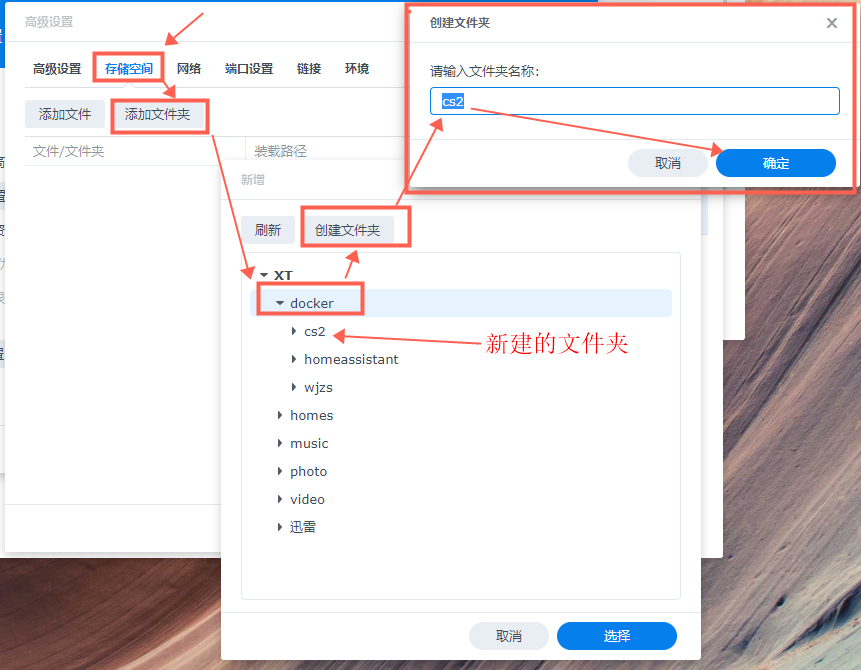
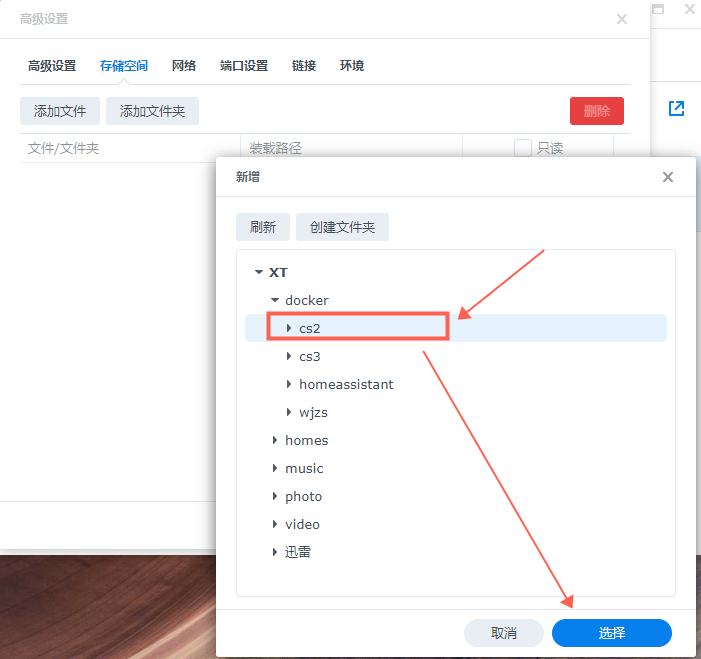
装载路径填写 “/etc/aliyundrive-webdav/”,千万不要写错;

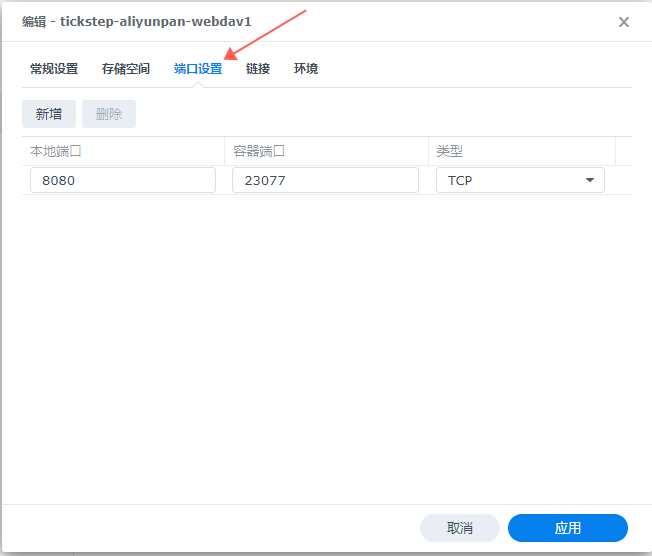
“本地端口” 建议自己填写个自己容易记并没有使用的(如端口已使用,会有提示),“容器端口” 我没动。这二个端口都可以自定义,看个人喜好。
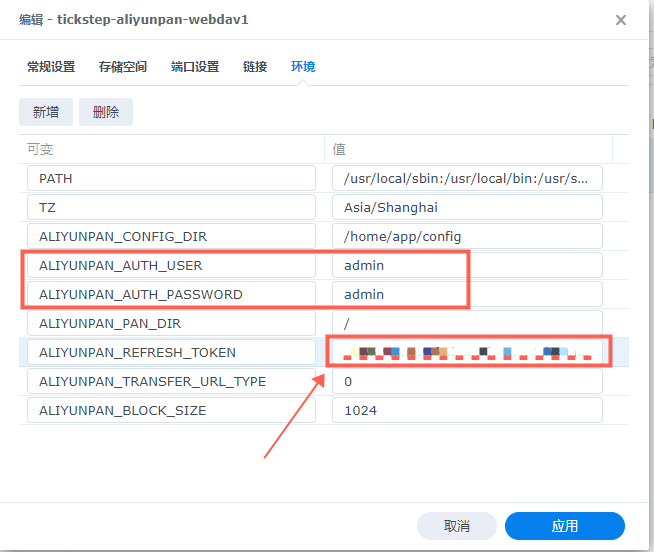
这个是超级爽的,里面所有的参数都是自动生成好的,只需要把 “阿里云盘的 token” 粘贴到下面 ALIYUNPAN_REFRESH_TOKEN 的值里面即可(下图打码处),“ALIYUNPAN_AUTH_USER ” 与 “ALIYUNPAN_AUTH_PASSWORD” 的值要记着,这个是后面链接时要用到的用户名与密码,也可以自己修改值;
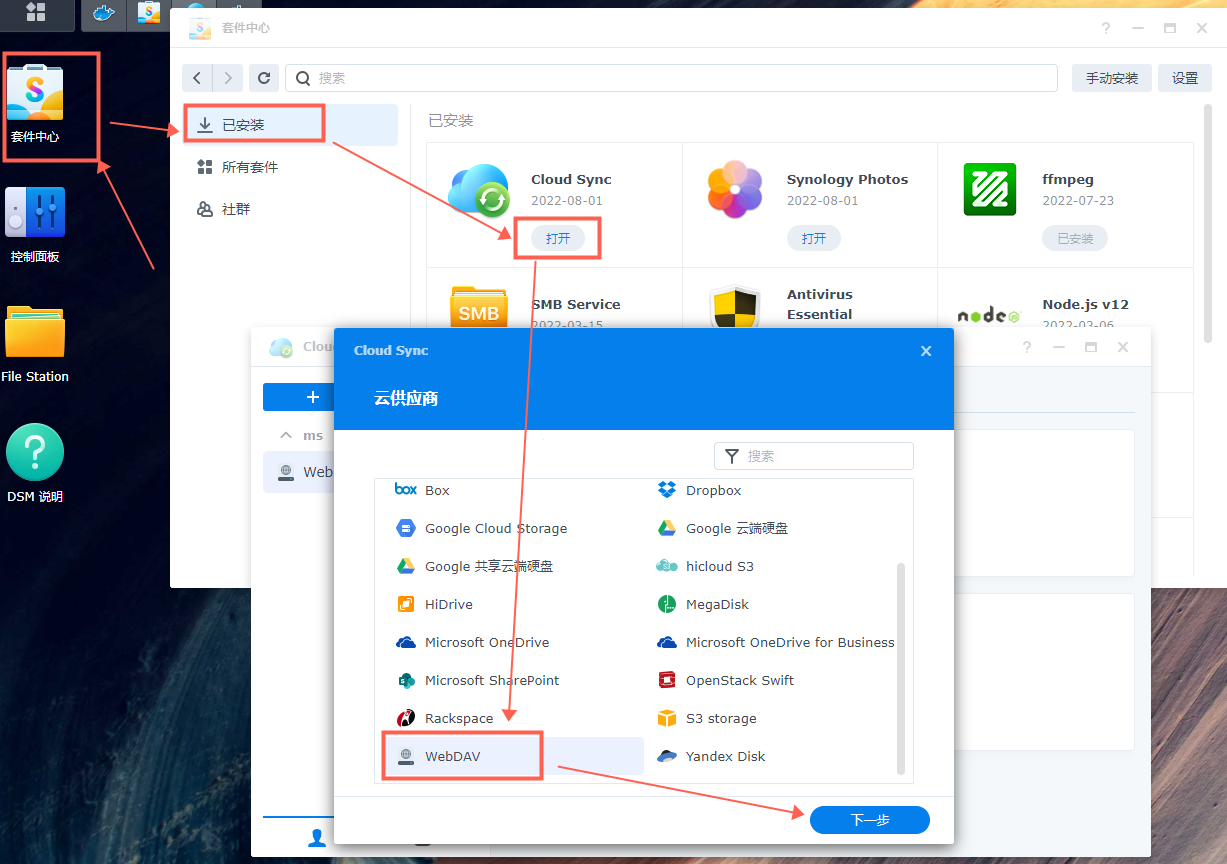
四、cloud sync 具体设置
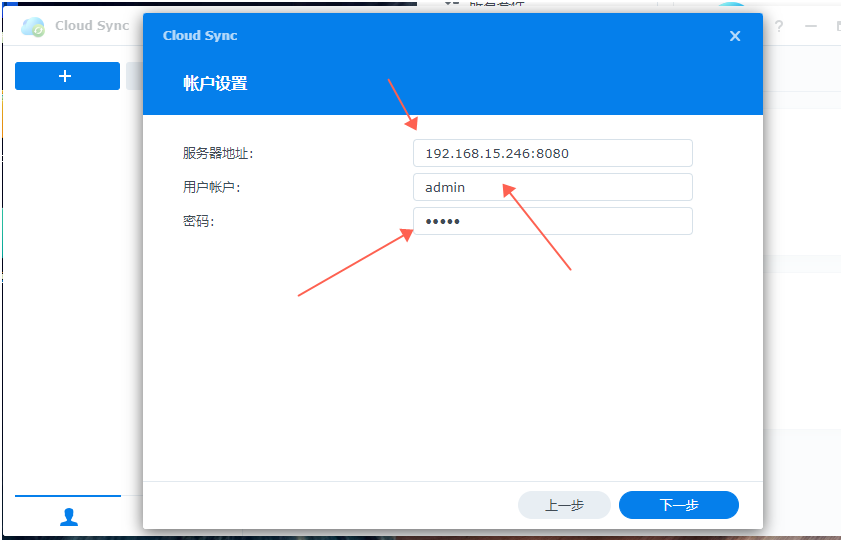
“服务器地址:192.168.15.246:8080” ,192.168.15.246 为我的局域网 IP(你可以填写你的 NAS 地址),8080 为我刚设置的本地端口(你可以填写你自己设置的端口);
用户账户:为 “ALIYUNPAN_AUTH_USER” 的值,如没有修改,默认值为:admin
密码:为 “ALIYUNPAN_AUTH_PASSWORD” 的值,如没有修改,默认值为:admin
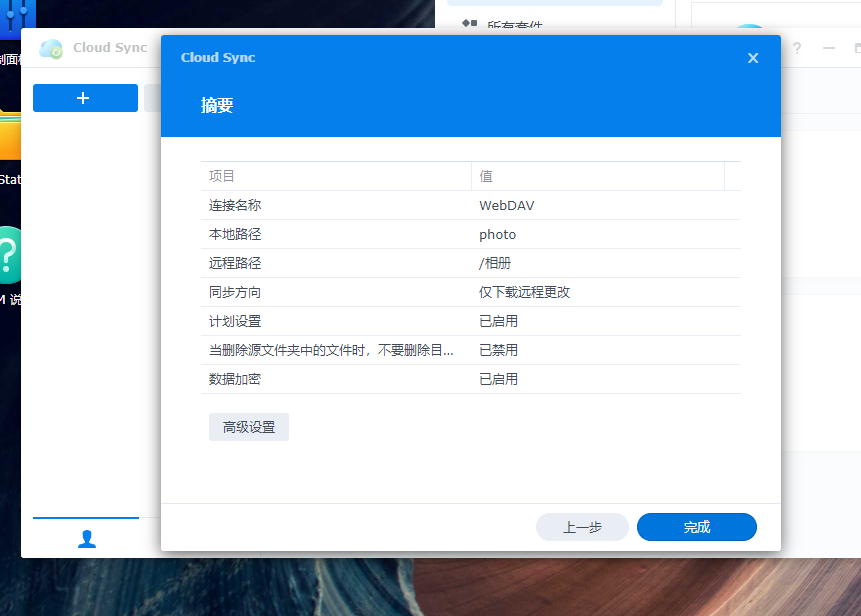
连接名称:这个自己起就可以(我是默认);
本地路径:这个是 NAS 上要备份的文件夹;
远程路径:这个是阿里云盘上要备份到的地方;
数据加密:这个如果选择了,备份到阿里云盘上的文件无法打开(因为文件加密过了),切选
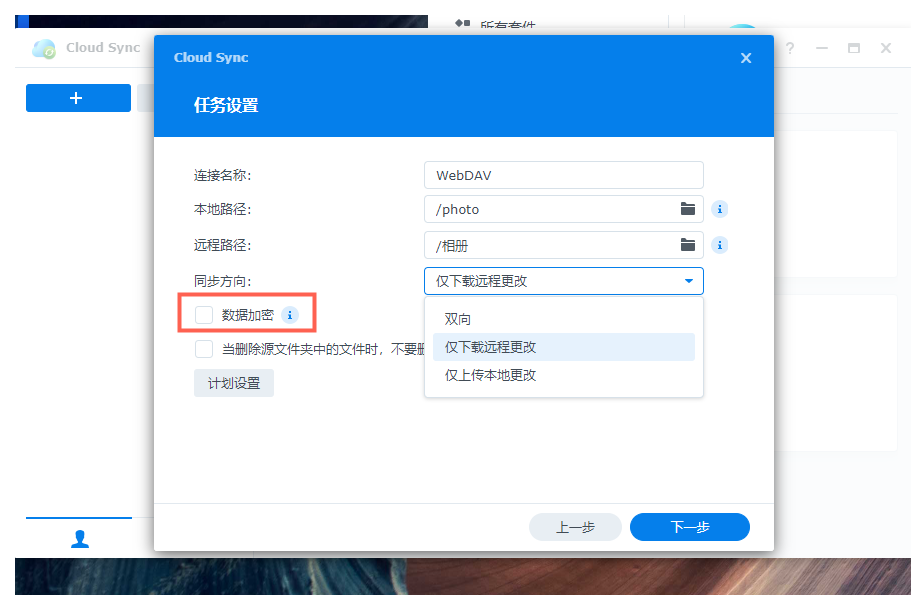
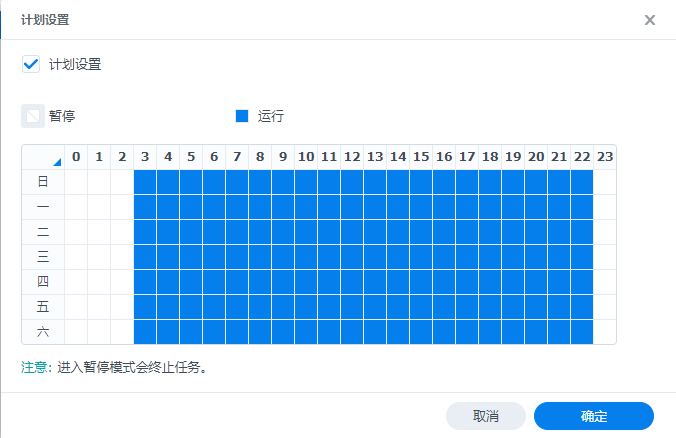
计划设置:这个可以设定备份在那个时间段进行备份
同步方向:双向、仅下载远程更改、仅上传本地更改 ,选择自己需要的
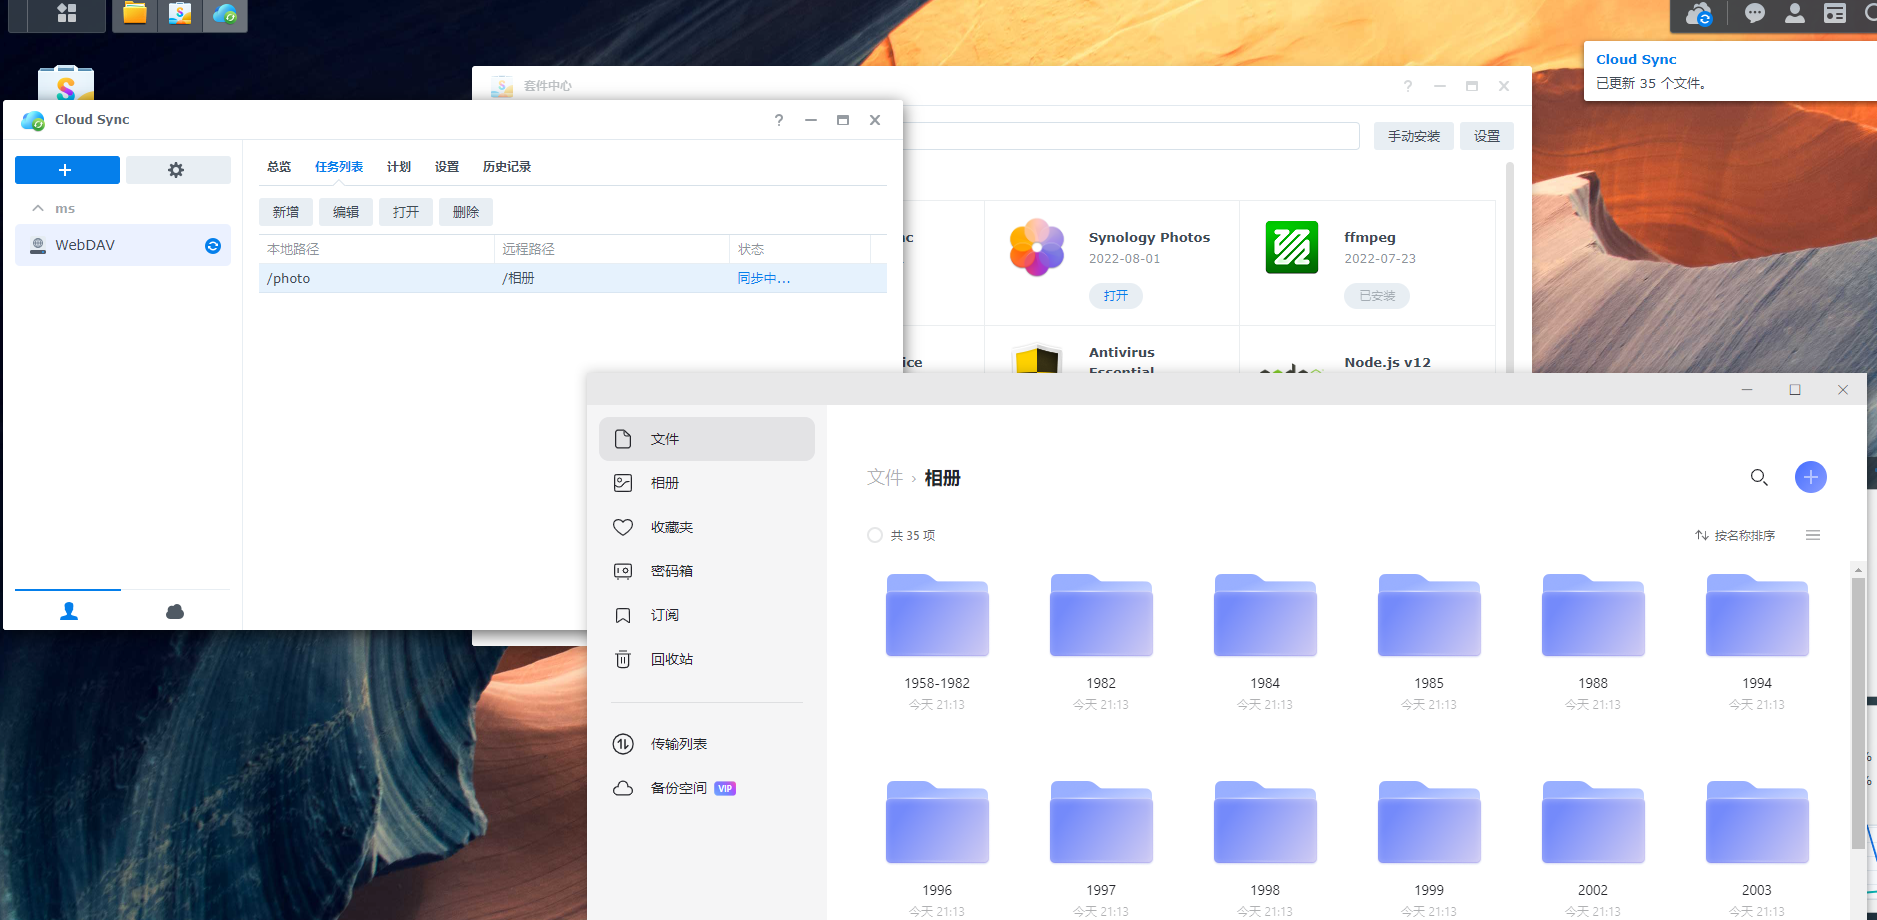
五、大功告成,网盘已开始同步云盘相片了